
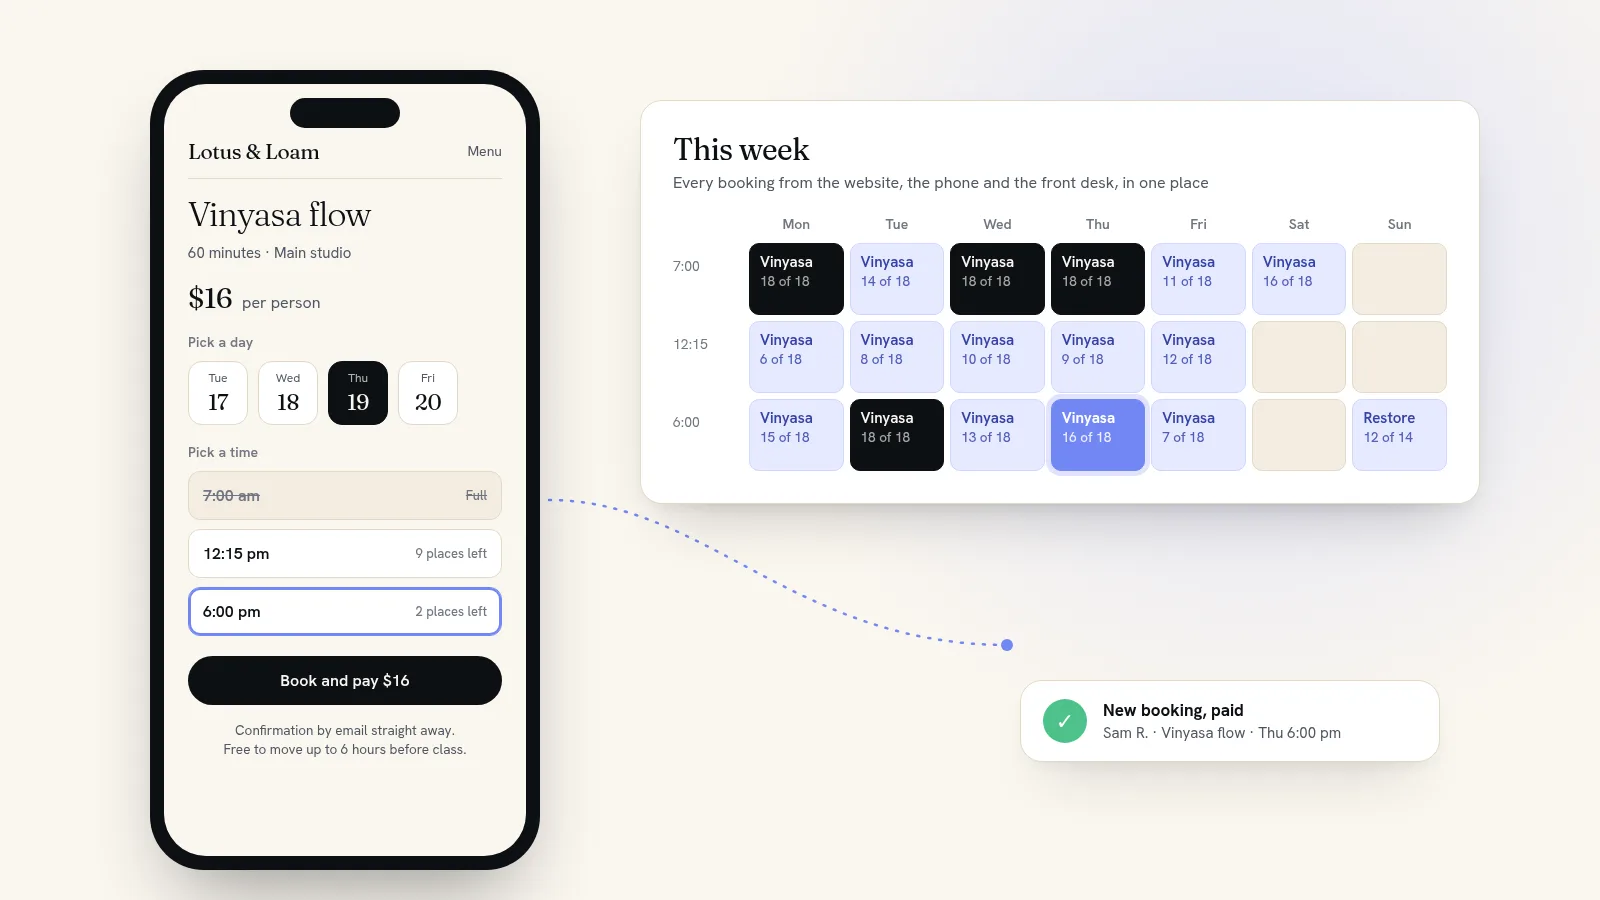
There are three ways to add online booking to a website: link to a booking page run by a scheduling app, put that app's booking box inside one of your pages, or use a website that takes bookings itself. All three need the same groundwork. You decide what people can book, when it's available, how many people each time holds, and whether they pay upfront. For most small businesses the third way is the tidiest, because the booking, the payment and the customer's details all stay on your own site, under your own name.
This guide covers each option, what it costs, and how to set booking up so people actually finish it.
Three ways to add booking to your website
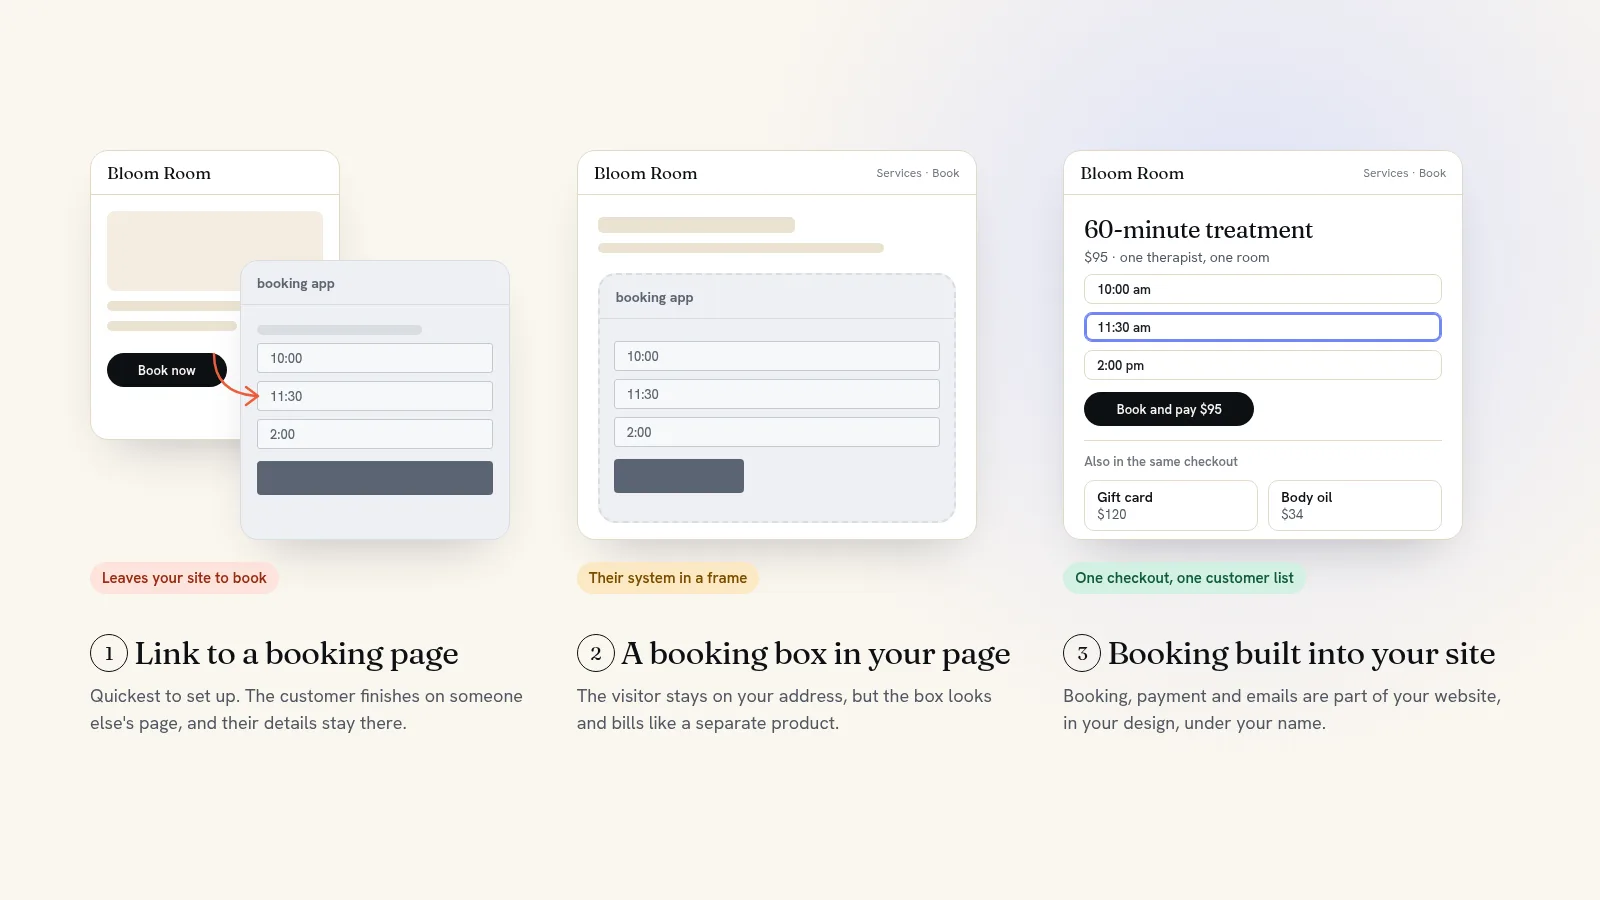
1. Link to a booking page
Every scheduling app gives you a public booking page. You add a "Book now" button to your site that opens it. It takes ten minutes, and it's a reasonable way to test whether your customers will book online at all.
The catch is that your customer leaves your website at the moment they decide to buy. They land on a page with someone else's layout, and some of them stop there. Their details, and the record of what they booked, live in the app's account rather than with the rest of your business.
2. Put a booking box inside your page
Most booking apps also let you paste their calendar into one of your own pages. The visitor stays on your address, which helps. It is still the app's booking system in a frame, though: it rarely matches the rest of your site, it has its own settings to keep in step with your website, and it bills you separately.
3. Take bookings on your own website
The third way is a website with booking built in. The timetable, the booking form, the checkout and the confirmation emails are part of the site. A customer can read about a service and book it on the same page, and buy a gift card or a product in the same checkout. You run one system, pay one bill, and keep one list of customers.
What online booking costs
Four common options, and what they charge. Calendly and Acuity are scheduling tools, so you still need a website to put them on.
| Option | Monthly price | Worth knowing |
|---|---|---|
| Calendly | Free plan, or Standard at $10 a seat, billed yearly | The free plan can't collect payments. Paid plans can take card or PayPal payments. |
| Square Appointments | Free plan, or Plus at $49 per location | Online payments cost 3.3% + 30¢ on the free plan and 2.9% + 30¢ on Plus. |
| Acuity Scheduling | Starter at $16 billed yearly ($20 monthly), Standard at $27 ($34) | Packages, memberships and gift certificates start on Standard. |
| Quick Elements | Plans from $29 a month, billed yearly, with your website, booking, shop and email included | 3.99% + 30¢ per card sale, card processing included, on every plan. |
The monthly price isn't the whole story. A free booking app plus a website builder plus an email tool adds up, and every extra tool is one more login and one more place a booking can go missing.
Decide what people are booking first
Every booking system asks the same handful of questions. Answer them on paper and the setup takes minutes.
- What is being booked? A one-to-one appointment, a place in a class, a whole room, or a visit to someone's home. They behave differently. A haircut takes one client per time, a yoga class takes eighteen, and an escape room sells the whole hour to one group.
- How long does it take, and when does it start? Fixed start times (9:30, 11:00, 2:00) are easier to fill than "any time between 9 and 5".
- How many people can one time hold, and how many places can one person book at once?
- Which days are you closed? Holidays, training days, the school run.
- How far ahead can people book? Two to six weeks suits most appointment businesses. Classes and workshops can open further out.
- Do they pay when they book? Full payment for classes and workshops, a deposit for long appointments, nothing for a free consultation.
How to add online booking, step by step
- List what people can book. One line each with the name, length, price and number of people. "60-minute massage, $95, one person." "Wheel throwing taster, 2 hours, $55, eight places."
- Set the schedule. Pick the days each one runs and the start times on each day. Mondays don't have to look like Saturdays.
- Block out time off. Add holidays and days away before you go live, so nobody can book them.
- Set limits. Places per time, the most one person can book, and how far ahead the diary opens.
- Turn on payment. Choose full payment, a deposit, or free, and switch on card payments.
- Write the emails. A confirmation that goes out straight away, and a reminder before the day with the address and anything to bring.
- Add a Book button everywhere it belongs. In the header of every page, on each service page, and at the end of your home page.
- Book yourself, on your phone. Go through it as a customer would, pay, and check both emails arrive. Then cancel and refund the test booking.
Setting up booking on Quick Elements
Every Quick Elements website comes with booking built in, so there's nothing to add or connect. The designs arrive with booking already set up the way each trade works: the plumber design offers 90-minute arrival windows on weekdays, the escape room design sells each hour to one group and prices it per player, and the yoga studio design sells places in a class. You change the times and prices to yours.
The steps above map onto it like this:
- Your own words. Choose what you offer, such as classes with places, appointments with bookings, or events with tickets, and every screen, button and email uses those words.
- Schedules. Repeat daily, weekly on the days you tick, monthly, or on specific dates only, with as many start times per day as you need and different times for different weekdays.
- Days off and how far ahead. Skip holidays, and choose how far ahead people can book.
- Prices and limits. Each option has a price, a number available for each time, and a minimum and maximum per booking. Extras such as equipment hire can only be bought alongside a booking.
- No overlaps. One booking can close other times so appointments never collide, with buffer minutes for cleaning or travel.
- Checkout and emails. Customers pay by card in your site's own checkout. Confirmations and reminders send themselves, and every booking lands in one sales list.
- Phone bookings. Enter a booking taken over the phone, record how they paid, and it counts against the places left just like an online one.
If you'd rather describe what you want than click through settings, ask the assistant built into your site: "make a page for my Saturday class" or "add a ticket to this event". It shows you the change before anything goes live. The booking guide covers every setting in detail.
Make the booking page easy to finish
People who start a booking and give up usually stop over something small. Check your page against this list:
- Show the price, and what it includes, before they pick a time.
- Show only times they can actually book.
- Ask for a name, an email and a phone number, and nothing else. Anything more can go in the confirmation email.
- Make it work with one thumb. Plenty of people will book from a link in a message or a social post, on their phone.
- Send the confirmation instantly, with a way to add the booking to their own calendar.
- Put your cancellation policy one line above where they pay, not three pages away.
Once bookings arrive from more than one place, the next thing to protect is your diary. Our guide to preventing double bookings covers that.
Take bookings on your own site with Quick Elements
A booking app does one job. Quick Elements gives you the website, the booking, the checkout, the reminder emails, an email address on your own domain and a list of every customer, under one plan and one login. You choose a plan, name your site, pick its address and a design made for your trade, and it's built in about two minutes once the address is connected. Then you change the times and prices to yours and share the link.
See the plans, or browse the designs to find one that already books the way your business does.