
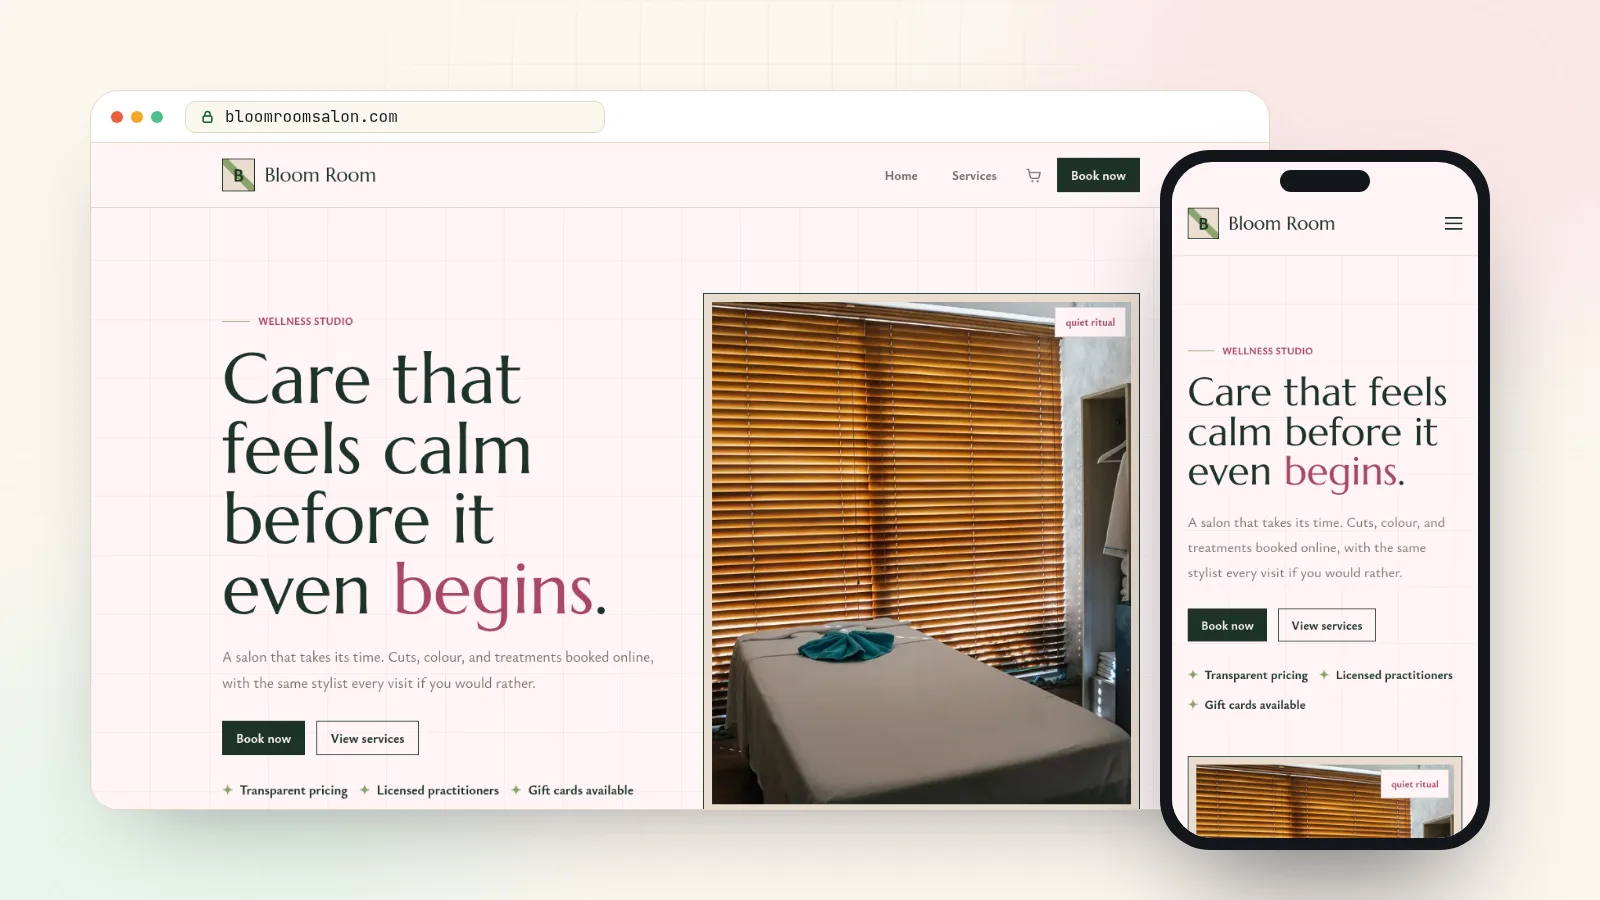
To make a website for your salon, start from a template designed for salons, write a service menu with prices and times, add online booking so clients can pick a slot without calling, and put a "Book now" button on every page. Add photos of your real work, your hours and location, and a clear cancellation policy. With a ready-made salon design, you can have it live in an afternoon and spend the evening on the words.
This guide goes through each part in the order clients look for it, with the details that turn a visitor into a booking.
What clients look for on a salon website
Someone looking at your site usually wants one of a handful of things, and wants it fast:
- Can I book? When's the next free slot, and can I take it now?
- What does it cost? A cut, a colour, a treatment, roughly how much and how long.
- Are you any good? Photos of real work, reviews, who's doing the cutting.
- Where and when? Address, parking, opening hours.
- What are the rules? Cancellations, lateness, consultations, patch tests for colour.
Every page on your site should answer at least one of those, and the booking button should never be more than a tap away.
Step 1: Choose your web address
Use your salon's name as your domain if you can get it, ideally ending in .com. If it's taken, add your town or what you do: "lunastudio.com" becomes "lunastudiodenver.com" or "lunahairstudio.com". Keep it easy to say over the phone. Our guide on choosing a domain name has more ideas. If you already own one, you can keep it and connect it to your new site.
Step 2: Start from a salon template
A template made for salons saves you from designing pages from scratch. It already has the pages a salon needs and the right booking words on its buttons, so you swap in your own photos and text.
When you compare templates, look past the photos (you'll replace them) and check three things:
- Is the booking button in the top menu on every page, including on a phone?
- Is there a proper service menu, with room for a price and length on every service?
- Does it look like your salon? A calm, botanical style suits a spa or wellness salon; a barbershop might want something bolder. Colours and fonts can change, but the overall feel is easier to keep than to fight.
Our salon template, Bloom, comes with a homepage, a services page and a contact page, plus a small shop for gift cards and retail products. Its booking pages already talk about appointments rather than tickets or events.
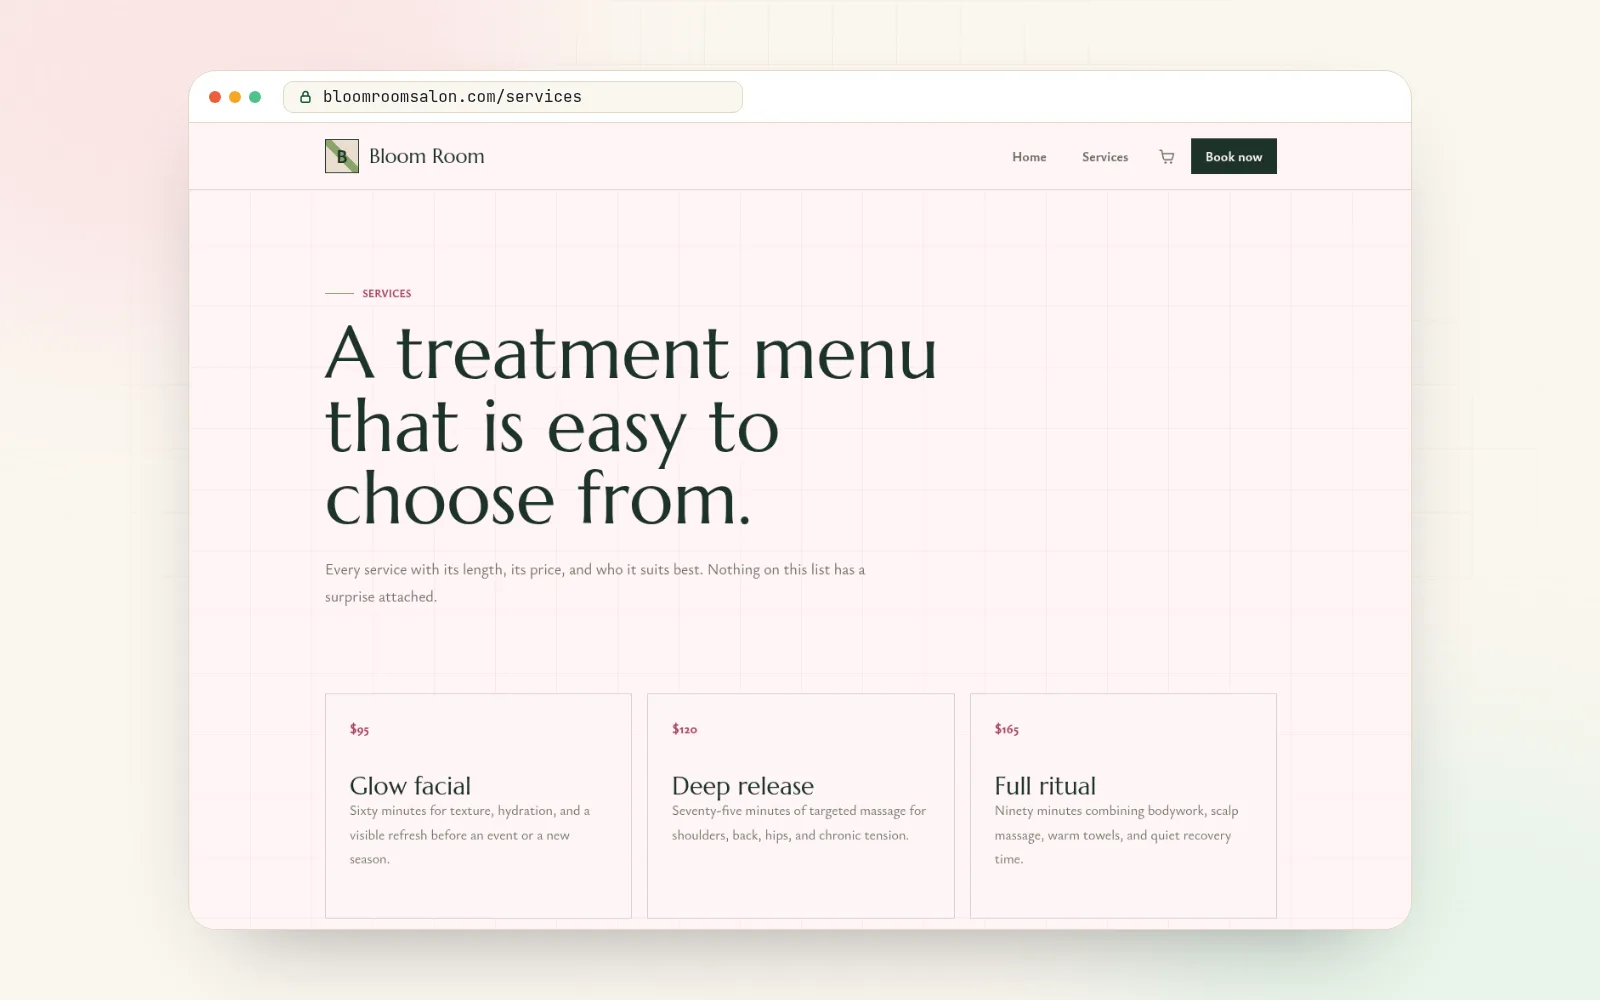
Step 3: Write your service menu
Your services page is the page clients study hardest. Make it easy to scan:
- Group services the way clients think: cuts, colour, treatments, packages.
- Give every service a length and a price. If prices vary by hair length or stylist, show a "from" price and say what changes it.
- Describe the result, not the process. "Sixty minutes for texture, hydration and a visible refresh before an event" tells a client more than a list of products.
- Note who it suits. First visit? Very thick hair? Colour correction? Say which service to book, so nobody books the wrong one.
Step 4: Set up online booking
Online booking is where a salon website earns its keep. Every booking that happens at 10pm is one you didn't have to take on the phone mid-colour. Set it up around how your days really work:
- Set the times you offer for each day. Tuesdays 9:30 to 5:30, late on Thursdays, closed Mondays. Days without times stay closed.
- Make each service its own booking option with its length and price, such as a 60-minute treatment and a 90-minute one.
- Stop double bookings. When two services need the same chair or the same person, booking one should block the other at that time. Add buffer minutes before or after for cleaning and setup.
- Block holidays and days off so clients never see a slot you can't keep.
- Choose how far ahead clients can book. A shorter window keeps your diary flexible; a longer one lets regulars book their next visit in advance.
- Keep taking phone and walk-in bookings in the same diary, so the online calendar never offers a slot you've already given away.
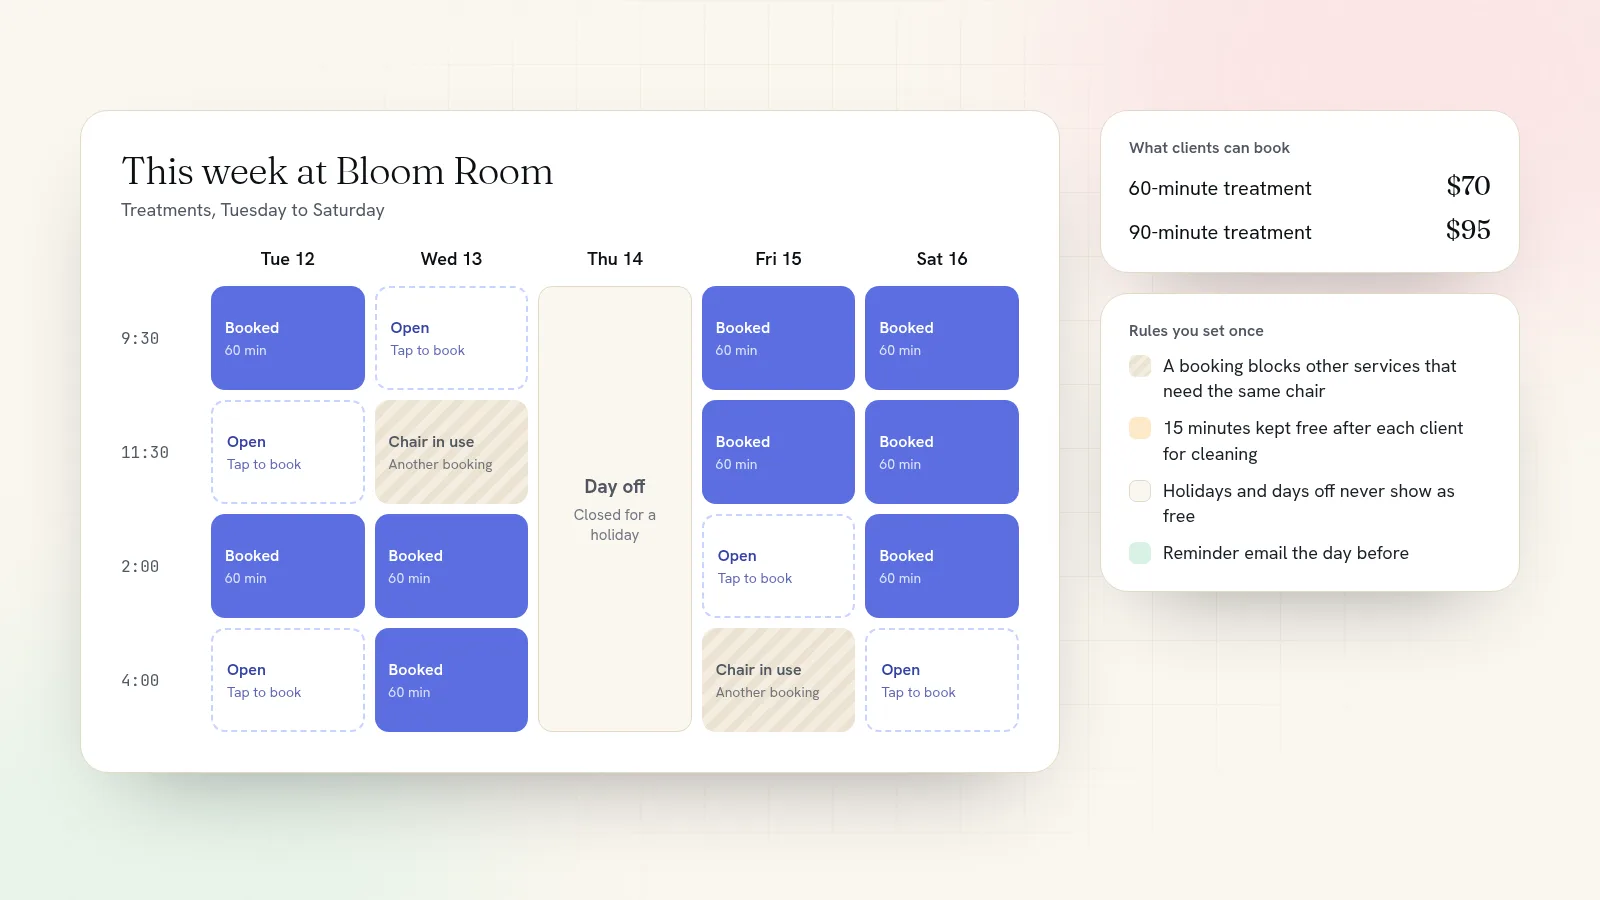
Then set up the emails: a confirmation straight after booking, a reminder the day before, and a follow-up afterwards asking for a review. A reminder gives anyone who'd forgotten the chance to turn up or move the slot, instead of leaving a gap in your day.
Step 5: Show your work and your team
Salons sell something visual, so let the photos do the work:
- Your own photos, not stock. Shoot finished work in daylight against a plain background. A phone is enough.
- Before and after for colour and big changes, with the client's permission.
- The space itself: the chairs, the basins, the front door, so a first-timer recognises it.
- Your team, each with a photo, a line about what they love doing and what they specialise in. Regulars ask for stylists by name, and new clients like to know who they'll get.
Shrink large photos before uploading, or use a site that converts them to lighter formats for you, so the gallery loads quickly on a phone.
Step 6: Write policies that protect your diary
Clear policies, stated before someone books, prevent most awkward conversations. Put them on the services page and in the booking confirmation:
- How much notice you need to cancel or move an appointment.
- What happens if a client is late.
- Whether colour services need a patch test first, and how far ahead.
- Whether first visits include a consultation.
Keep them short and friendly. "Need to move your appointment? Let us know 24 hours ahead and there's no charge" reads better than a block of rules in capitals.
Step 7: Get found locally
New clients often find a salon by searching for one nearby. Three things help you show up:
- Write your search titles for local searches. "Hair salon in East Austin, cuts and colour booked online" beats "Home".
- Set up your Google Business Profile with "Hair salon" (or your exact type) as the category, and link it to your website. Here's how to get your business on Google Maps.
- Ask for reviews in the follow-up email after each appointment, while the new haircut still feels good.
Booking app or your own website?
Plenty of salons start with a booking app and a profile page on someone else's platform. It works, but the page is built around the app rather than around your salon, and every client you send there gets to know the app's name as well as yours. Your own website keeps the booking on your address, in your design, next to your prices and your photos.
If you're weighing up a switch from a salon booking app, see how Quick Elements compares with Vagaro and Mindbody.
Build your salon website with Quick Elements
Quick Elements gives you everything above in one place. Bloom, the salon template, arrives with your homepage, services and contact pages, a shop for gift cards and retail products, and booking that speaks in appointments. Booking handles the parts that matter to a salon: time slots for each weekday, days off, a booking window, one booking blocking another when they share a chair, buffer time between clients, phone bookings in the same diary, and confirmation, reminder and follow-up emails you write yourself. Clients can move straight from your prices to a booked slot without leaving your site.
Every plan includes your own .com or .org, business email on it, and hosting with the padlock. Clients can pay by card as they book, at 3.99% + 30¢ per sale with card processing included. See the salon template and start your site today.